Configuration
For our plugin to run smoothly our plugin requires WooCommerce plugin and Elemenetor plugin installed and activated and at least One product added to woocommerce. You're now good to go..! Proceed to the installation steps below.
Installation
Follow the steps below to get started with our Ultra WooBuilder Plugin.
- Please unzip the downloaded file and place it to location which is accessible with ease. Open the folder. You'll be presented with 2 sub folders demonstrated below:
Documentation- This is the documetation folder where you will find the details about plugin configurations and how to use.Plugin Zip File- Plugin zip file to be uploaded to your site.
- Now Login to WordPress admin dashboard. Go to
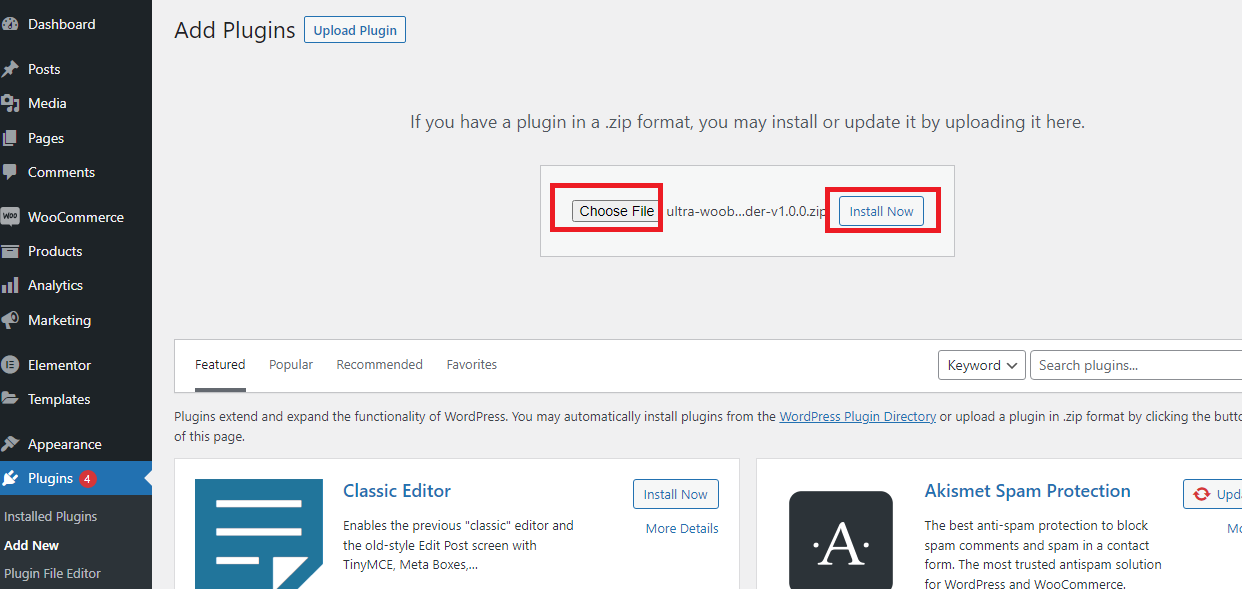
Plugins>Add New. And click on 'Upload Plugin' button.
- Then a uploader will appear. You can upload ultra-woobuilder.zip by clicking choose file and after choosing zip file click on "Install Now" button. The plugin will be installed.
- After successful plugin installation. Please activate the plugin by clicking 'Activate plugin' button.

- After activating the plugin you will find
Ultra WooBuilderin the right sidebar.
- Navigate Through
Ultra WooBuilderto configure the plugin. There you will find 'Plugin Settings' and 'My Templates' submenu pages.
Plugin Settings
This is the main settings page for the plugin. Here you will find settings for enable or disable elements for each pages, enable disable option for modules, settings for woocommerce default template configuration and global settings. Here you will find 4 sub tabs for settings.

Elements
In this tab you will find different elements for each WooCommerce pages. For each pages you will get different elements and you can enable or disable the elements as per you need. In this tab you will find options to enable or disable the elements for shop page, archive page, search result page, single page, cart page, checkout page, thank you page, my account page and other general elements.

Modules
Besides WooCommerce page elements, Here you will find other elements for enable and disable. Currently we have only cross domain copy paste module. In future updates of a plugin we will add more modules here.

WooCommerce Templates
Here you can enable or disable default templates or assign default template created on my templates for various WooCommerce pages like shop page, archive page, product search result page, cart page, checkout page, my account page separately. If you disable the default template it will show the default woocommerce template and if enabled and selected custom WooCommerce templates then the selected custom template will be used.

Global Settings
Here you can enable or disable the multistep/Quick Checkout method and enable or disable custom add to cart button labels. If you have disabled the multistep/quick checkout then the multistep checkout elements will not be available in the editor. Similary, if you disable the custom add to cart buttons label then the default add to cart buttons will appear on the site.

My Templates
This is the page for creating custom WooCommerce templates for WooCommerce Pages using Elementor page builder. Here you can create and edit templates as per your need for WooCommerce pages using different elements available for each page. You can create templates for shop/archive/search result page, single page, cart page, checkout page, thank you page and my account page using differnt available elements.

Add New Template
Please follow the steps below to create a new template.
Navigate to
Ultra WooBuilder-Templates Builderand Click on "Add New Template".
-
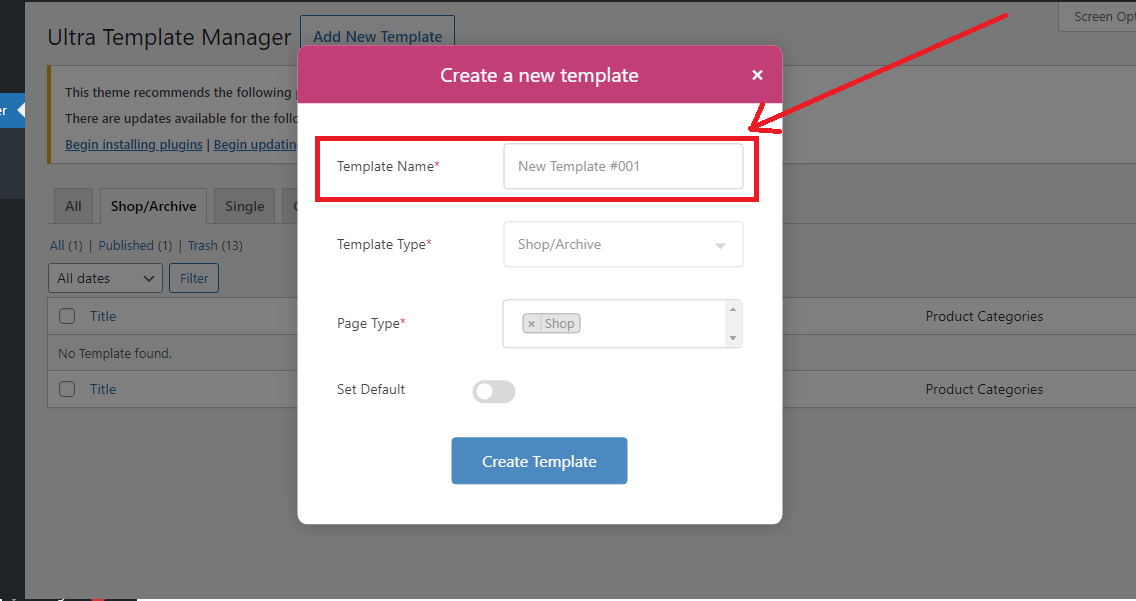
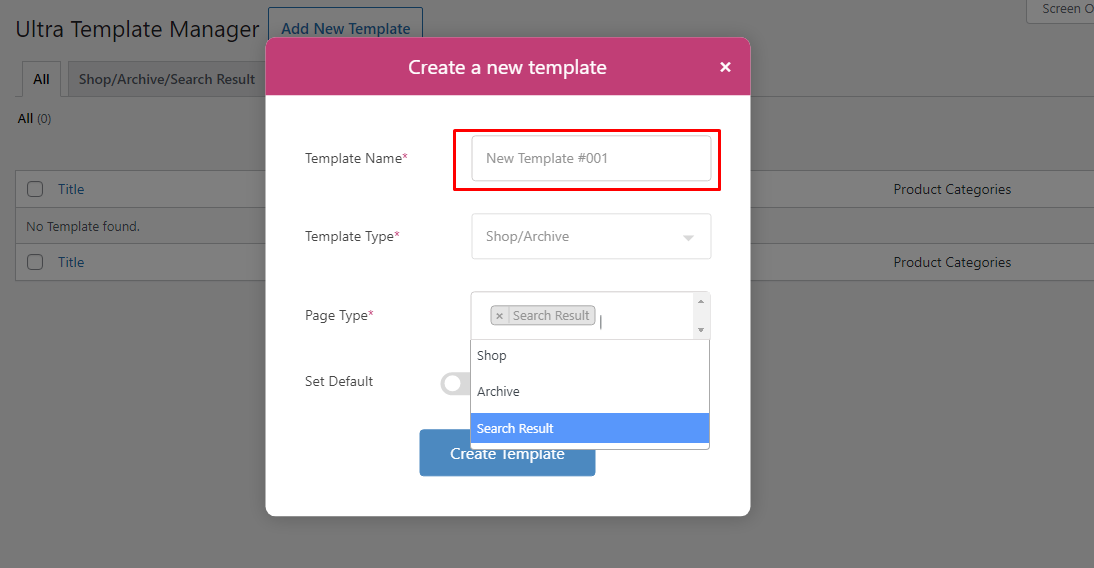
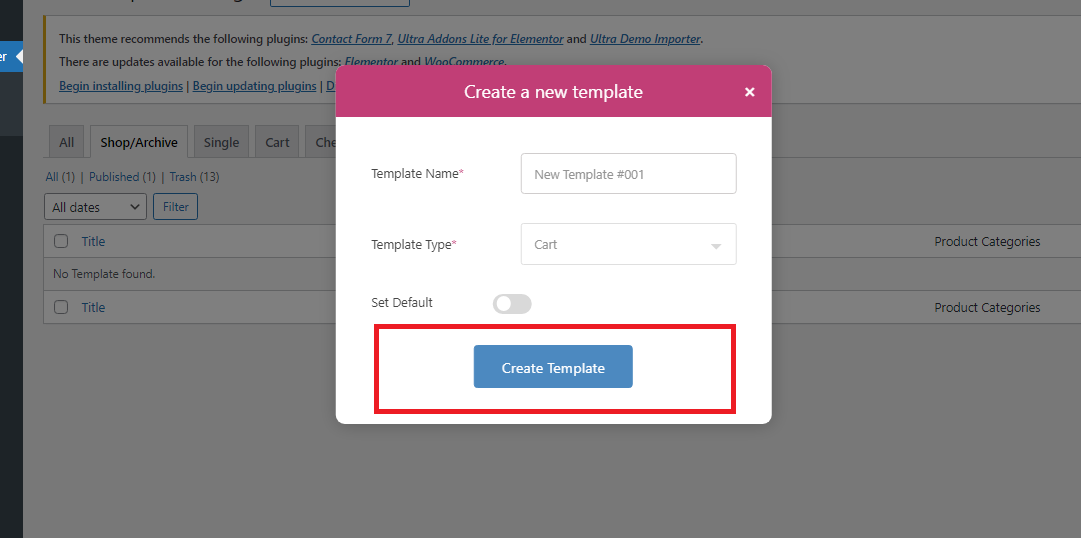
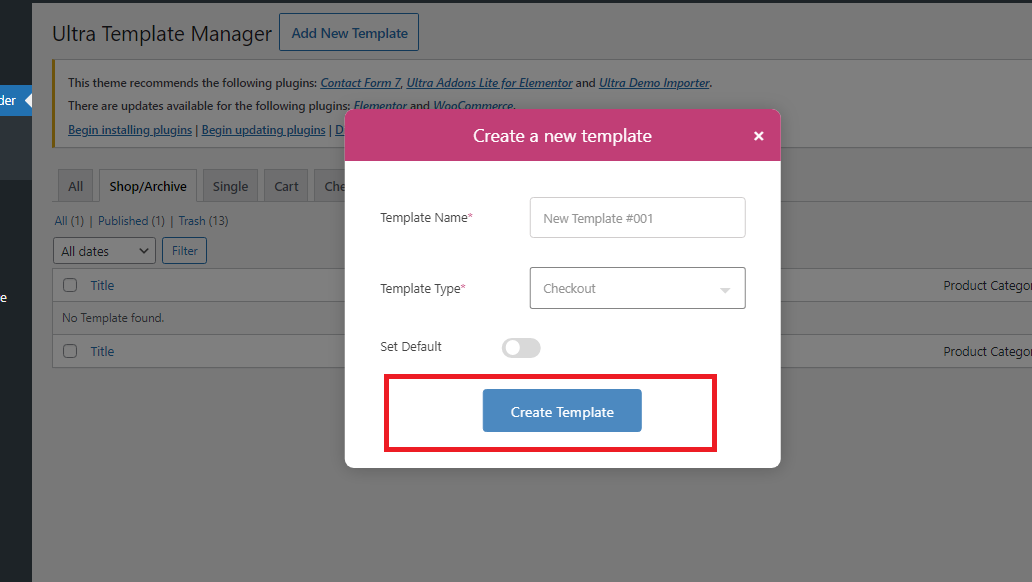
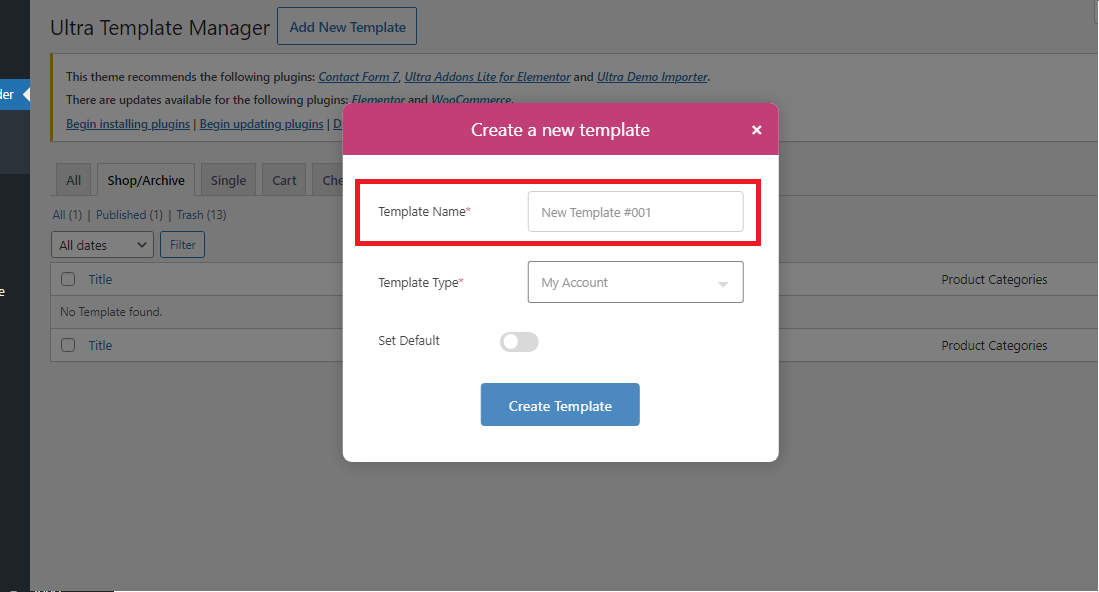
When you click on "Add New Template" button a popup will appear where you can enter details about the template.
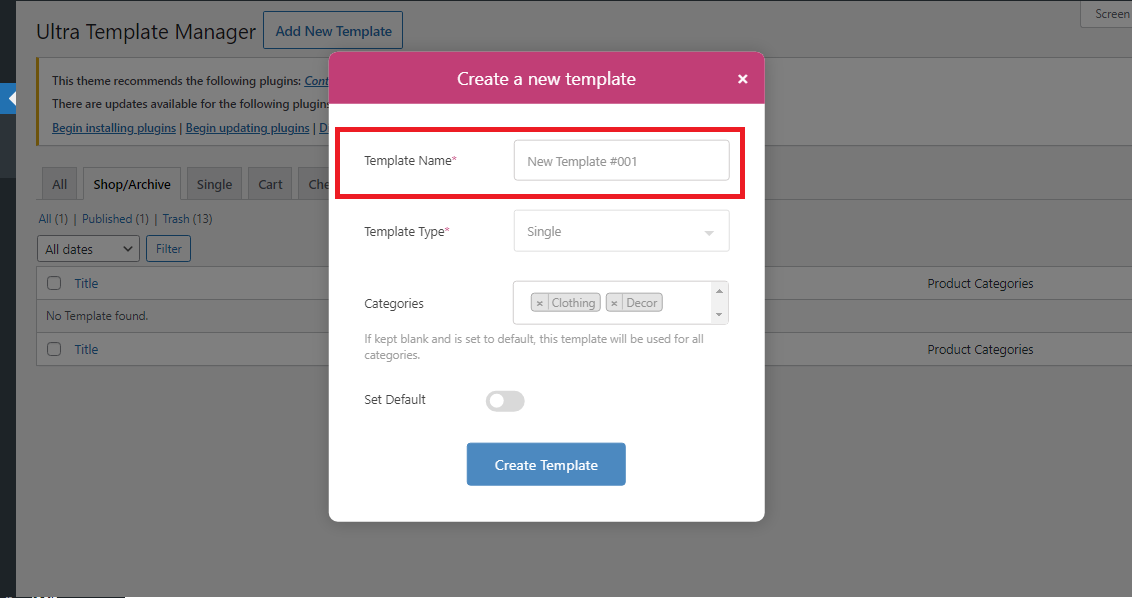
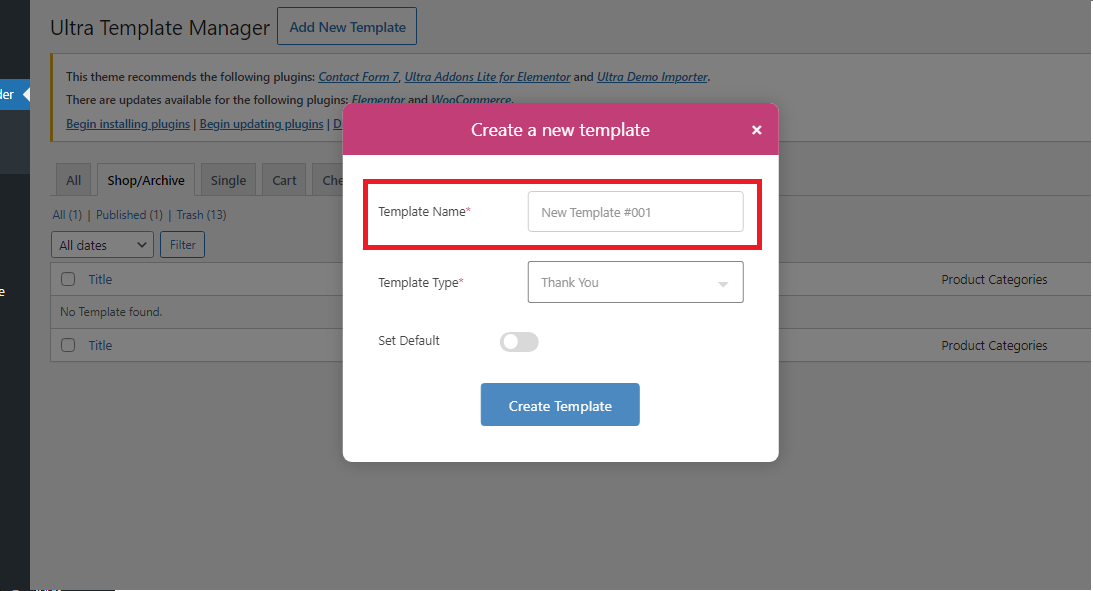
Template Name: Please enter the name of the template for your reference. This template name will be used as template title for templates listing.

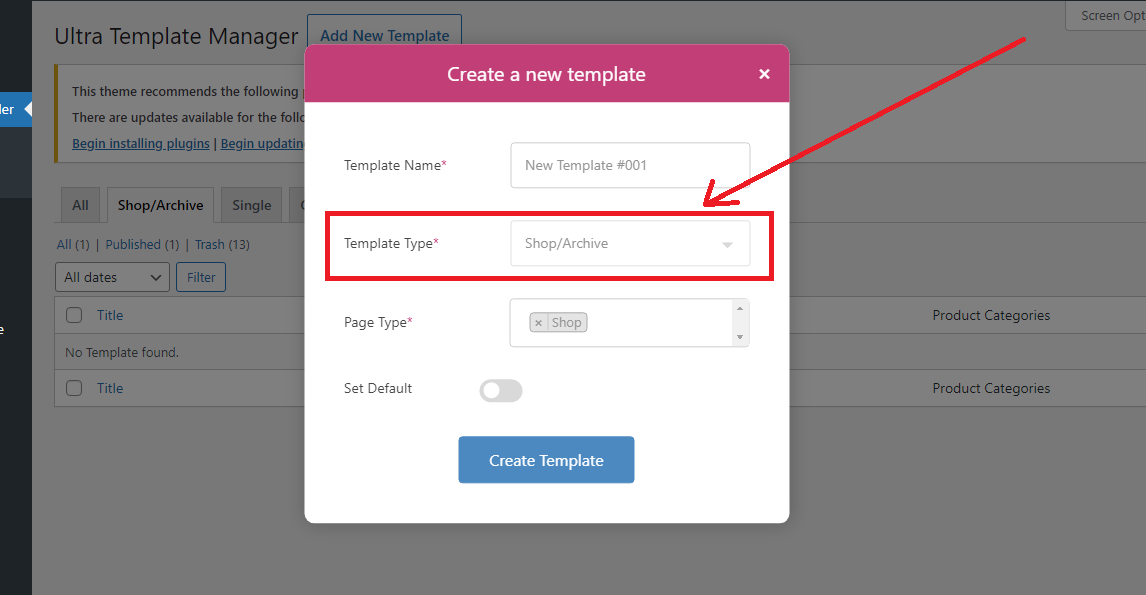
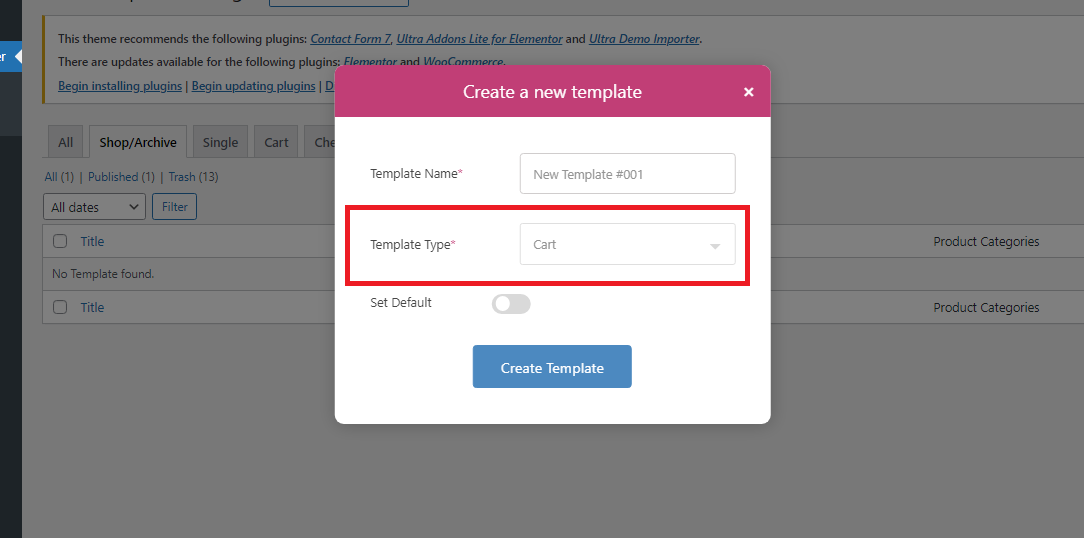
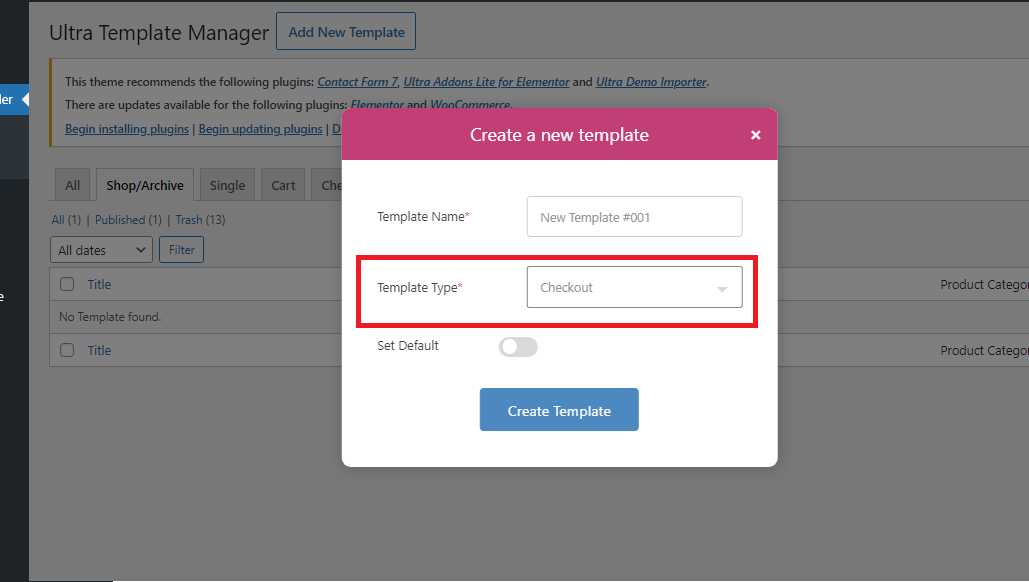
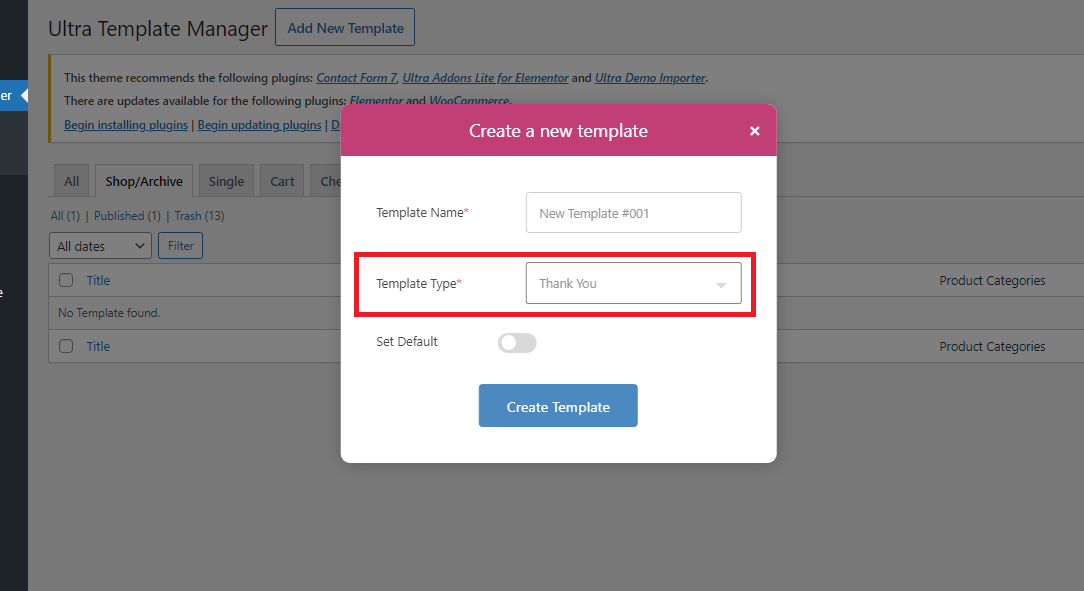
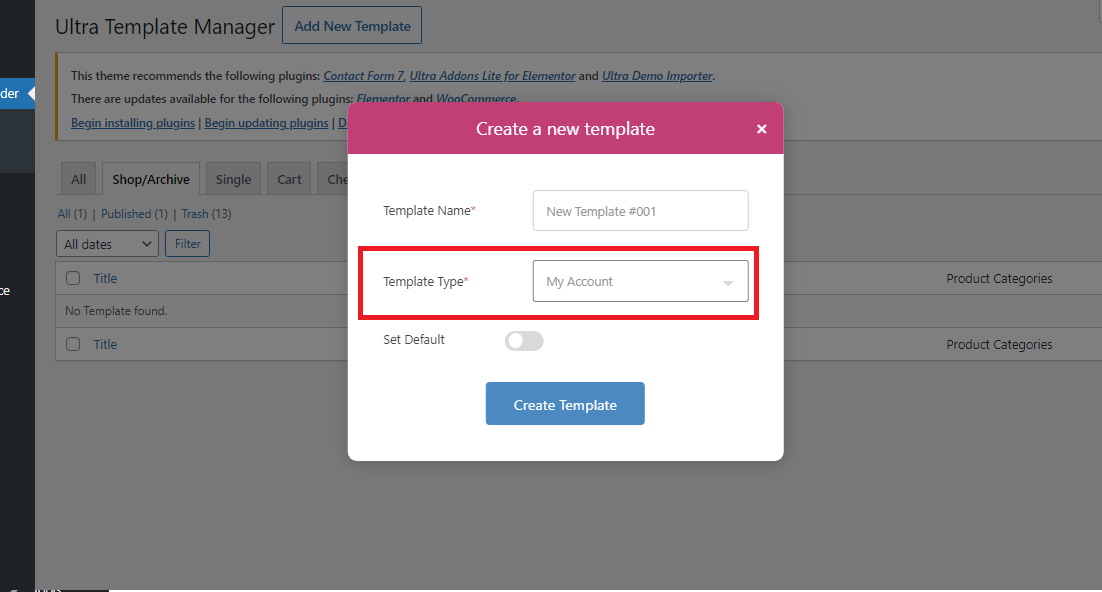
Template Type: Please select the template type you want to use. A dropdown will appear where you can select shop/archive page, single page, cart page, checkout page, thank you page and my account page.

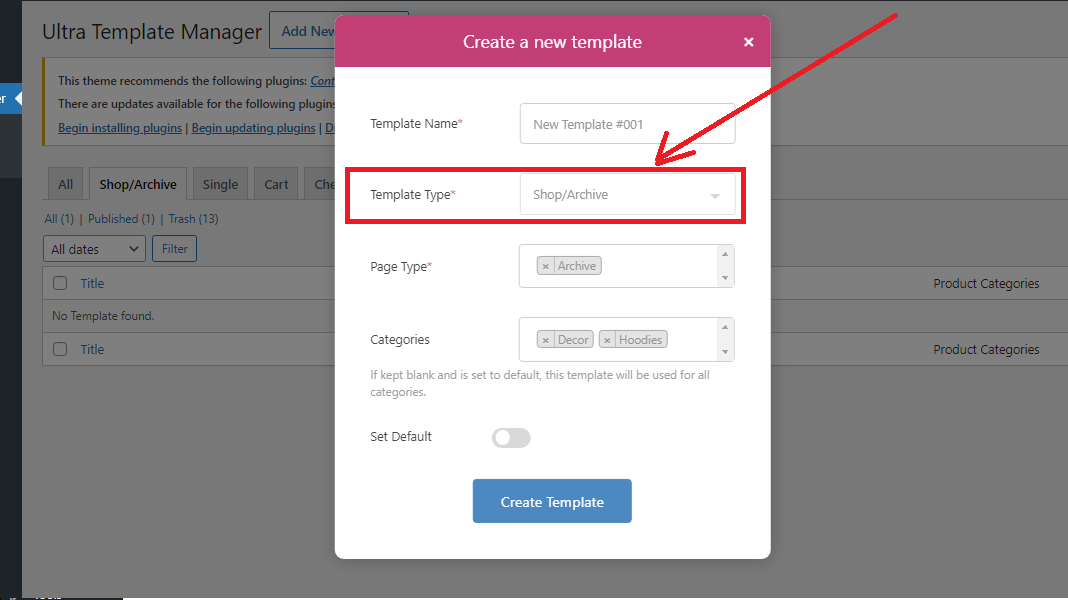
Page type: If you select the template type to shop/archive page you will need to select page type either shop, archive or search result page.

Categories: If you have selected template type to shop/archive page and page type to archive; you will get the categories selection option where you can select categories where this template will be used for display of the content.

Set Default: If you want to set this template as a default template for selected template type or page type you need to enable this option.
Please note: When you set this template as a default template other template's default will be unset for that page type.
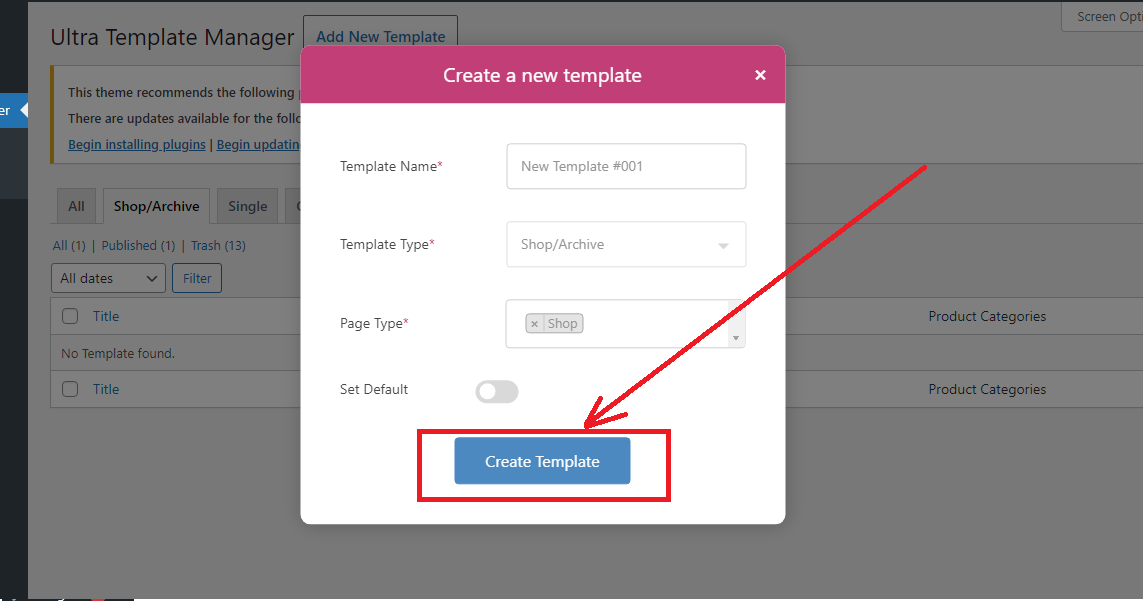
After all those configuration to create template please click on 'Create Template' button.

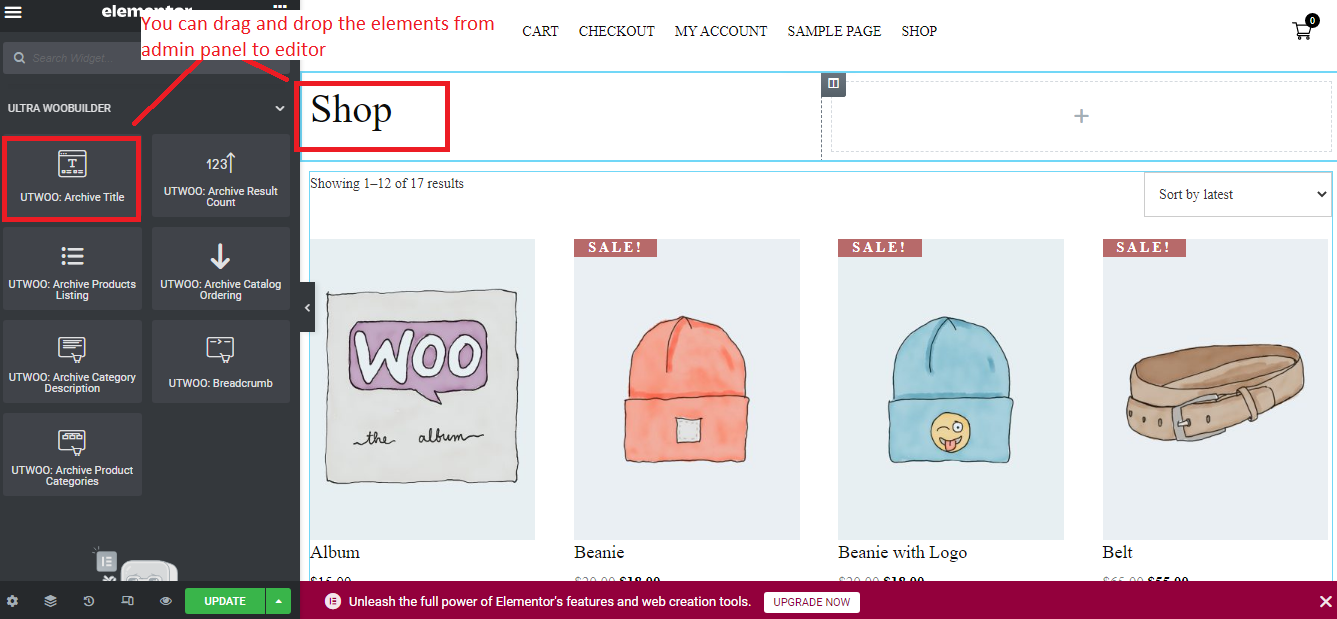
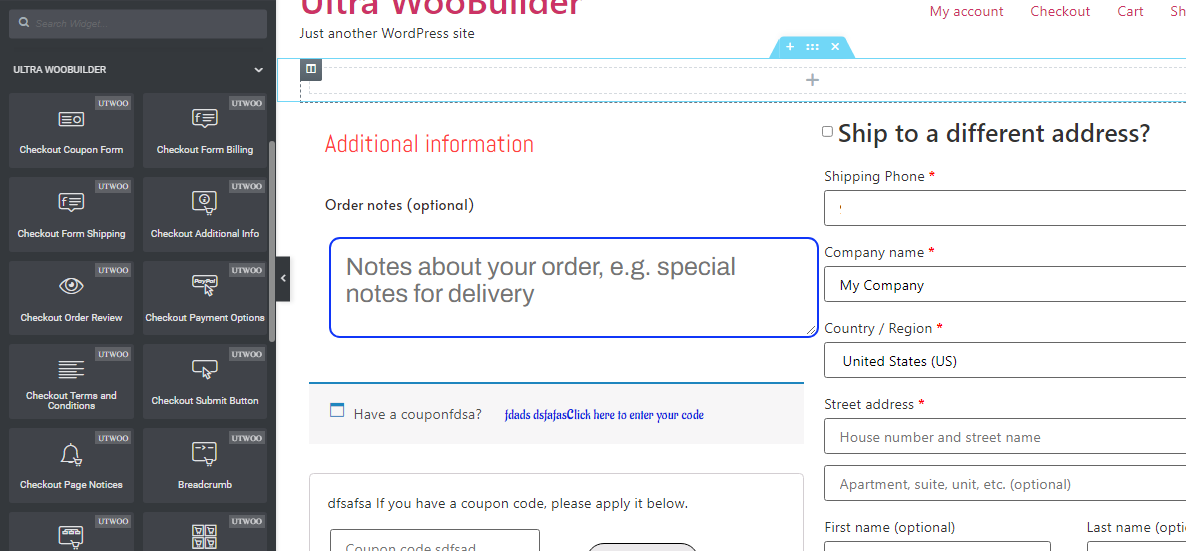
Now when you click "Create template" button you will be redirected to page builder page to build the template. Here you can build the page as per your need for selected page type. You can get the available/enabled elements of Ultra WooBuilder on the widgets/elements selection. The elements can be dragged and dropped to the editor and can configure each element as per your need from available options.

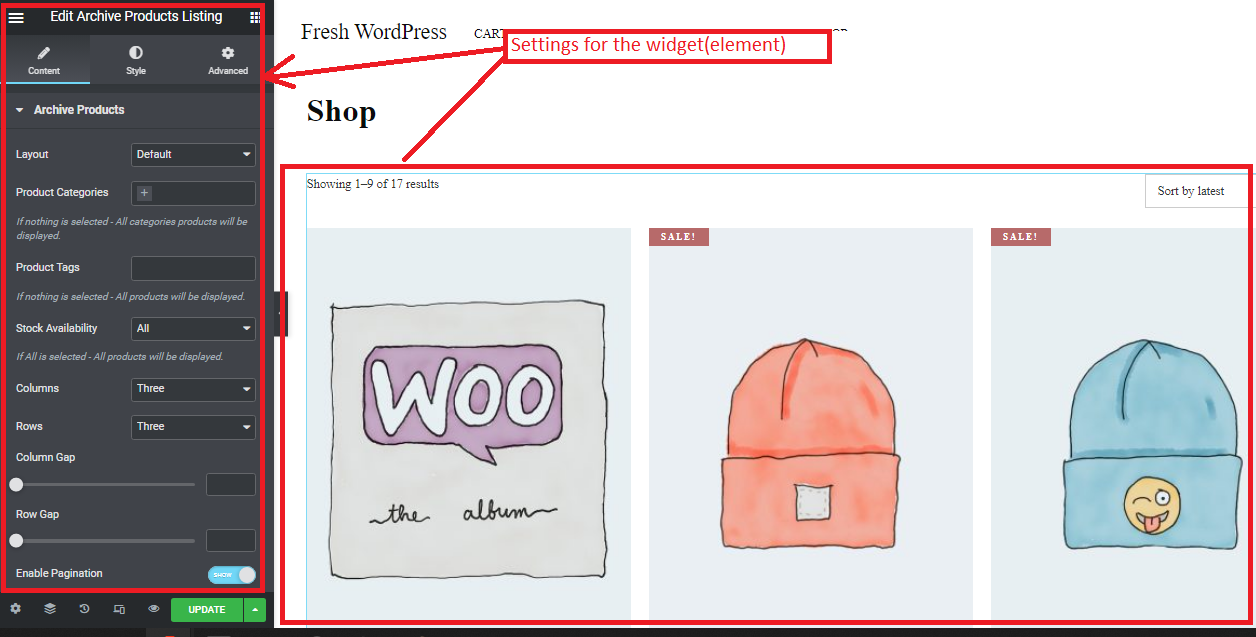
For each widget(element) you will get the configuration settings options which you can configure as per your need.
After adding required widgets(elements) to the page builder click on update button. Now the template will be saved and if you have set it to default the template will be applied to frontend. You can view the changed on the assigned page on frontend.

After creating multiple templates for different WooCommerce pages you can access each page types by clicking on sub tabs for each page types. You can access all templates by clicking 'All' tabs.

Edit Template
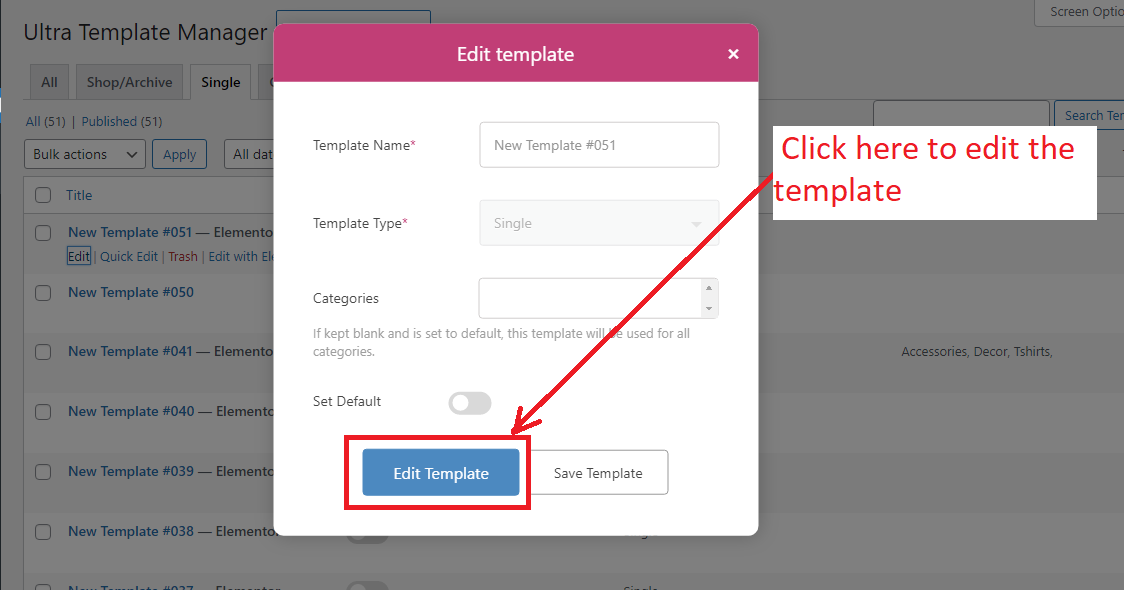
For created templates if you want to edit the templates later after creating you can click on edit or edit with elementor link to edit the template.

After that a popup will appear which is same like create template popup and you can edit the name and other allowed parameters and after that you can click on edit template button to edit this template or if you want to save those changed parameters you can simply click save template to save the parameters.
Now when you click "Edit template" button you will be redirected to page builder to build the template. Here you can build the page as per your need for selected page type. You can get the available/enabled elements of Ultra WooBuilder on the widgets/elements selection.

Templates Listing
All the created templates will be listed here. All created templates can be accessable through all tab. Page wise templates can be listed by clicking on each page type. For example if you have created several templates for shop/archive page all the shop/archive page templates will be listed here and if you have created multiple templates for single page all the templates will be listed under single page tab.
The columns available for templates listings are:
Title: This is the title of the template that you have given.Mark Default: When mark default is set here this template will be used for template override in frontend for woocommerce page.Template Type: This is the template type that you have created for.Product Categories: If you have created a template for archive pages or single pages then the list of the categories will be shown here. If blank it will be used for all categories.
Now when you click "Edit template" button you will be redirected to page builder to build the template. Here you can build the page as per your need for selected page type. You can get the available/enabled elements of Ultra WooBuilder on the widgets/elements selection.
How to create a template
Creating a template is very easy you need to go to Ultra WooBuilder - Templates Builder and there you will find options for managing and creating new tempalates.
How to create shop page template.
Please follow the steps below to create a shop template.
Navigate to
Ultra WooBuilder-Templates Builderand Click on "Add New Template".
-
When you click on "Add New Template" button a popup will appear where you can enter details about the template.
Template Name: Please enter the name of the shop template for your reference. This template name will be used as template title in templates listing.
Template Type: Please select the template type to shop from a dropdown.
Page type: Plese select the page type to shop.
Set Default: If you want to set this template as a default template forshop page you need to enable this option.
Please note: When you set this template as a default template other template's default will be unset for that page type.
After all those configuration to create template please click on 'Create Template' button.
Now when you click "Create template" button you will be redirected to page builder page to build the template. Here you can build the page as per your need for selected page type. You can get the available/enabled shop page elements of Ultra WooBuilder on the widgets/elements selection. The elements can be dragged and dropped to the editor and can configure each element as per your need from available options.
For each widget(element) you will get the configuration settings options which you can configure as per your need.
After adding required widgets(elements) to the page builder click on update button. Now the template will be saved and if you have set it to default the template will be applied to frontend. You can view the changed on the assigned page on frontend.
How to create archive page template.
Please follow the steps below to create a archive page template.
Navigate to
Ultra WooBuilder-Templates Builderand Click on "Add New Template".
-
When you click on "Add New Template" button a popup will appear where you can enter details about the template.
Template Name: Please enter the name of the archive template for your reference. This template name will be used as template title in templates listing.

Template Type: Please select the template type to shop/archive from a dropdown.
Page type: Plese select the page type to archive.

Categories: Plese select the categories where you want to use this template.

Set Default: If you want to set this template as a default template for archive page you need to enable this option.
Please note: When you set this template as a default template other template's default will be unset for archive page type.
After all those configuration to create template please click on 'Create Template' button.

Now when you click "Create template" button you will be redirected to page builder page to build the template. Here you can build the page as per your need for selected page type. You can get the available/enabled shop page elements of Ultra WooBuilder on the widgets/elements selection. The elements can be dragged and dropped to the editor and can configure each element as per your need from available options.
For each widget(element) you will get the configuration settings options which you can configure as per your need.
After adding required widgets(elements) to the page builder click on update button. Now the template will be saved and if you have set it to default the template will be applied to frontend. You can view the changed on the assigned page on frontend.
How to create search result page template.
Please follow the steps below to create a search result template.
Navigate to
Ultra WooBuilder-My Templatesand Click on "Add New Template".
-
When you click on "Add New Template" button a popup will appear where you can enter details about the template.
Template Name: Please enter the name of the search result template for your reference. This template name will be used as template title in templates listing.
Template Type: Please select the template type to shop/archive from a dropdown.
Page type: Plese select the page type to search result.

Set Default: If you want to set this template as a default template for search result page you need to enable this option.
Please note: When you set this template as a default template other template's default will be unset for that page type.
After all those configuration to create template please click on 'Create Template' button.
Now when you click "Create template" button you will be redirected to page builder page to build the template. Here you can build the page as per your need for selected page type. You can get the available/enabled shop page elements of Ultra WooBuilder on the widgets/elements selection. The elements can be dragged and dropped to the editor and can configure each element as per your need from available options.
For each widget(element) you will get the configuration settings options which you can configure as per your need.
After adding required widgets(elements) to the page builder click on update button. Now the template will be saved and if you have set it to default the template will be applied to frontend. You can view the changed on the assigned page on frontend.
How to create single page template.
Please follow the steps below to create a single page template.
Navigate to
Ultra WooBuilder-Templates Builderand Click on "Add New Template".
-
When you click on "Add New Template" button a popup will appear where you can enter details about the template.
Template Name: Please enter the name of the single template for your reference. This template name will be used as template title in templates listing.
Template Type: Please select the template type to single from a dropdown.

Categories: Plese select the categories where you want to use this template.

Set Default: If you want to set this template as a default template for single page you need to enable this option.
Please note: When you set this template as a default template other template's default will be unset for single page type.
After all those configuration to create template please click on 'Create Template' button.

Now when you click "Create template" button you will be redirected to page builder page to build the template. Here you can build the page as per your need for selected page type. You can get the available/enabled shop page elements of Ultra WooBuilder on the widgets/elements selection. The elements can be dragged and dropped to the editor and can configure each element as per your need from available options.

For each widget(element) you will get the configuration settings options which you can configure as per your need.
After adding required widgets(elements) to the page builder click on update button. Now the template will be saved and if you have set it to default the template will be applied to frontend. You can view the changed on the assigned page on frontend.
How to create cart page template.
Please follow the steps below to create a cart page template.
Navigate to
Ultra WooBuilder-Templates Builderand Click on "Add New Template".
-
When you click on "Add New Template" button a popup will appear where you can enter details about the template.
Template Name: Please enter the name of the archive template for your reference. This template name will be used as template title in templates listing.

Template Type: Please select the template type to cart from a dropdown.
Set Default: If you want to set this template as a default template for cart page you need to enable this option.
Please note: When you set this template as a default template other template's default will be unset for cart page type.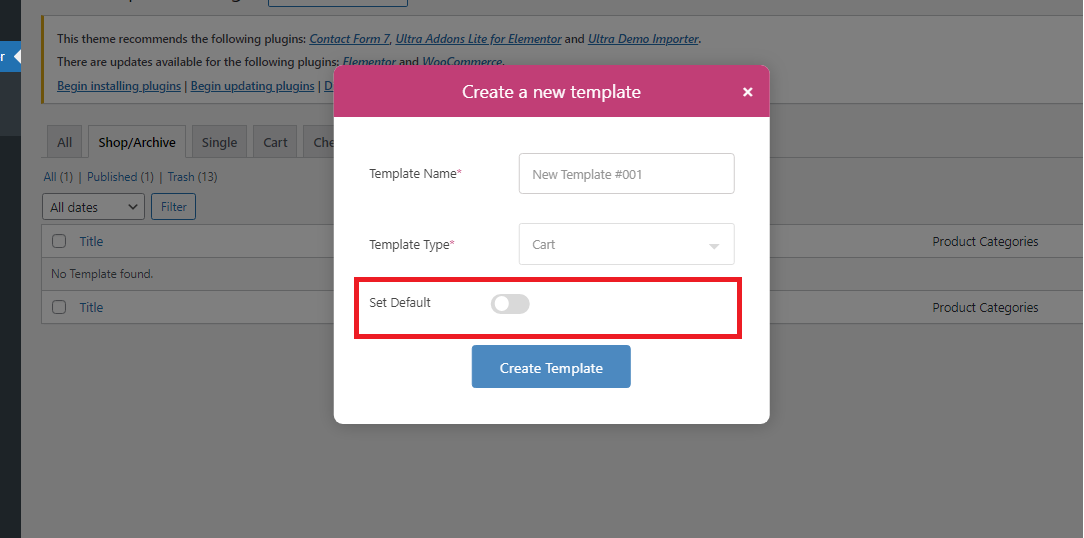
After all those configuration to create template please click on 'Create Template' button.
Now when you click "Create template" button you will be redirected to page builder page to build the template. Here you can build the page as per your need for selected page type. You can get the available/enabled shop page elements of Ultra WooBuilder on the widgets/elements selection. The elements can be dragged and dropped to the editor and can configure each element as per your need from available options.
For each widget(element) you will get the configuration settings options which you can configure as per your need.
After adding required widgets(elements) to the page builder click on update button. Now the template will be saved and if you have set it to default the template will be applied to frontend. You can view the changed on the assigned page on frontend.
How to create checkout page template.
Please follow the steps below to create a checkout page template.
Navigate to
Ultra WooBuilder-Templates Builderand Click on "Add New Template".
-
When you click on "Add New Template" button a popup will appear where you can enter details about the template.
Template Name: Please enter the name of the checkout template for your reference. This template name will be used as template title in templates listing.

Template Type: Please select the template type to checkout from a dropdown.
Set Default: If you want to set this template as a default template for checkout page you need to enable this option.
Please note: When you set this template as a default template other template's default will be unset for checkout page type.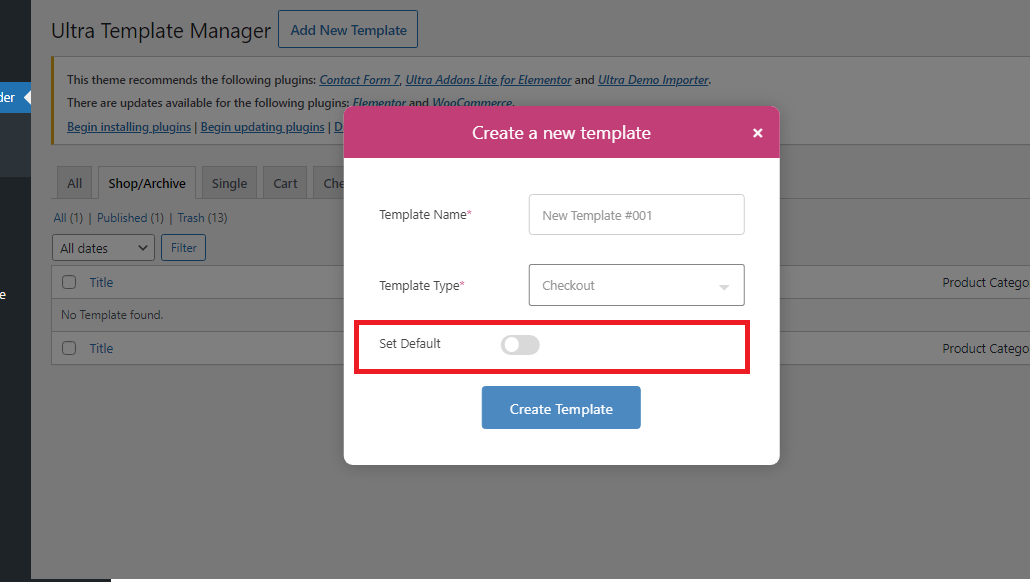
After all those configuration to create template please click on 'Create Template' button.
Now when you click "Create template" button you will be redirected to page builder page to build the template. Here you can build the page as per your need for selected page type. You can get the available/enabled shop page elements of Ultra WooBuilder on the widgets/elements selection. The elements can be dragged and dropped to the editor and can configure each element as per your need from available options.
For each widget(element) you will get the configuration settings options which you can configure as per your need.
After adding required widgets(elements) to the page builder click on update button. Now the template will be saved and if you have set it to default the template will be applied to frontend. You can view the changed on the assigned page on frontend.
How to create thank you page template.
Please follow the steps below to create a thank you page template.
Navigate to
Ultra WooBuilder-Templates Builderand Click on "Add New Template".
-
When you click on "Add New Template" button a popup will appear where you can enter details about the template.
Template Name: Please enter the name of the thank you template for your reference. This template name will be used as template title in templates listing.
Template Type: Please select the template type to thank you from a dropdown.
Set Default: If you want to set this template as a default template for thank you page you need to enable this option.
Please note: When you set this template as a default template other template's default will be unset for thank you page type.
After all those configuration to create template please click on 'Create Template' button.

Now when you click "Create template" button you will be redirected to page builder page to build the template. Here you can build the page as per your need for selected page type. You can get the available/enabled shop page elements of Ultra WooBuilder on the widgets/elements selection. The elements can be dragged and dropped to the editor and can configure each element as per your need from available options.

For each widget(element) you will get the configuration settings options which you can configure as per your need.
After adding required widgets(elements) to the page builder click on update button. Now the template will be saved and if you have set it to default the template will be applied to frontend. You can view the changed on the assigned page on frontend.
How to create my account page template.
Please follow the steps below to create a my account page template.
Navigate to
Ultra WooBuilder-Templates Builderand Click on "Add New Template".
-
When you click on "Add New Template" button a popup will appear where you can enter details about the template.
Template Name: Please enter the name of the my account template for your reference. This template name will be used as template title in templates listing.
Template Type: Please select the template type to my account from a dropdown.
Set Default: If you want to set this template as a default template for my account page you need to enable this option.
Please note: When you set this template as a default template other template's default will be unset for my account page type.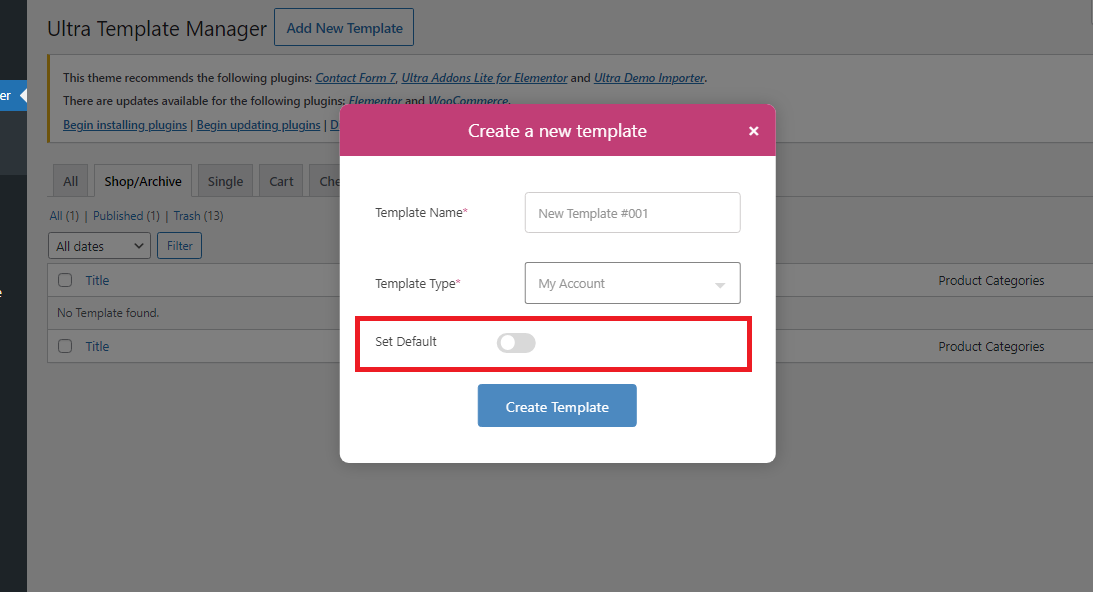
After all those configuration to create template please click on 'Create Template' button.

Now when you click "Create template" button you will be redirected to page builder page to build the template. Here you can build the page as per your need for selected page type. You can get the available/enabled shop page elements of Ultra WooBuilder on the widgets/elements selection. The elements can be dragged and dropped to the editor and can configure each element as per your need from available options.
For each widget(element) you will get the configuration settings options which you can configure as per your need.
After adding required widgets(elements) to the page builder click on update button. Now the template will be saved and if you have set it to default the template will be applied to frontend. You can view the changed on the assigned page on frontend.
Pagewise Elements
In My Templates you can get various elements(widgets) from our plugin for each pages. For each page you will get different elements required for those page.For shop/archive page, single page, cart page, checkout page, thank you page and my account page you can get different elements(widgets) for use. There are also common elements which can be used in any pages as per your need. The elements available are as follows.
Shop Page Elements
To create a page for Shop page the elements that are available from our plugin are as follows:
Archive title: This is the title of the archive page. For shop page the archive title will be Shop.Archive products listing: This element will be used to display the products for shop or archive page.Archive result count: This element will display the number of products available on a page.Archive catalog ordering: Products ordering available for sorting of the products with various selection options.Archive category description: This element will be used for display of the category description for archive pages.Archive products filter bar: This element will allow to add various filter bars options on the shop and archive listing page.Archive products offcanvas filter bar: This element will allow to add various filter bars options as offcanvas(popup) on the shop and archive listing page.

Single Page Elements
To create a page for Single page, the elements that are available from our plugin are as follows:
Product Title: This element will display the product title.Product Gallery: This element will display the product images.Product Short Description: This element will display the product description.Product Price: This element will display the product price.Product Meta: This element will display the product meta. It will include product sku, product tags and product categories.Product Meta(SKU): This element will display the product meta SKU.Product Meta(Tags): This element will display the product meta Tags.Product Meta(Categories): This element will display the product Meta categories.Add To Cart Button: This element will display the add to cart button of a product.Stock: This element will display the product's stock availability.Upsell: This element will display the product's upsell and cross sell products.Product Rating: This element will display the product rating.Product Average Rating: This element will display the product's average rating.Product Data Tabs(Description, Additional Information, Reviews): This element will display the product data tabs. It includes product description, it's additional information and it's reviews.Description: This element will display the product description.Additional Information: This element will display the product additional information.Reviews: This element will display the product reviews.Related Products: This element will display the product's related products.Product Stock Status Bar: This element will display the product stock status bar.Product Social Share: This element will display the social share buttons.Single Page Notices: This element will display the product's notices.Floating Add To Cart Bar: This element will display the add to cart buttons on floating at bottom and top of the page.

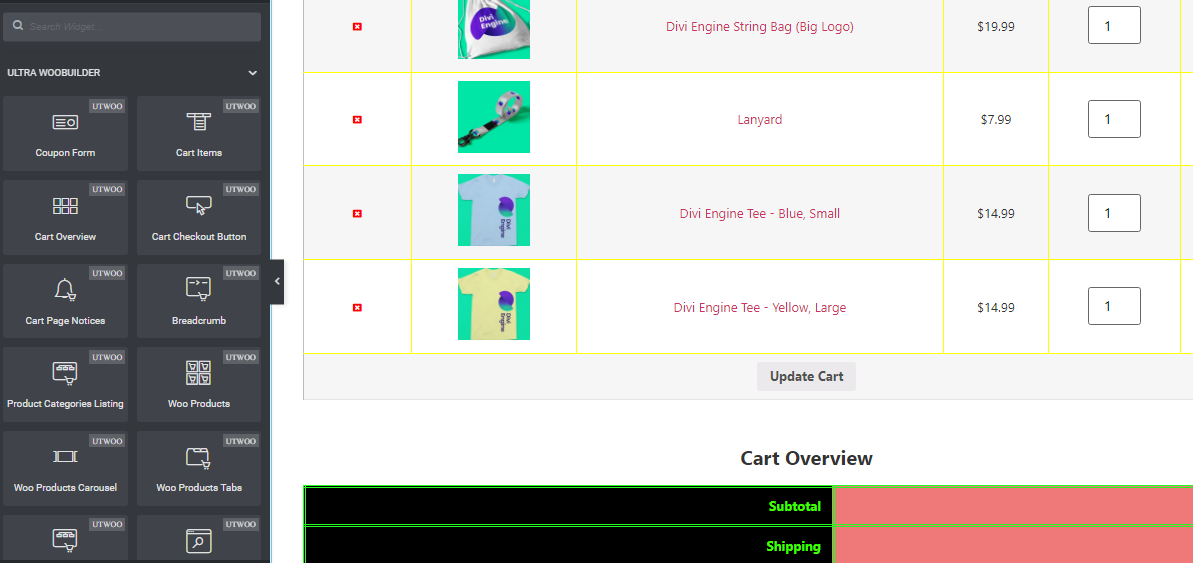
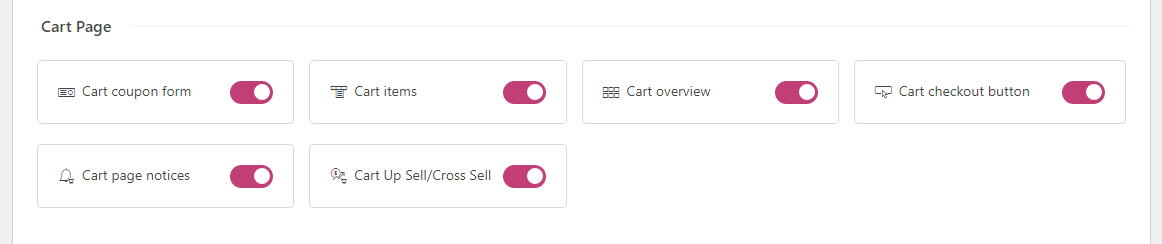
Cart Page Elements
To create a page for Cart page, the elements that are available from our plugin are as follows:
Cart Coupon Form: This element will display the coupon form.Cart Items: This element will display the cart items.Cart Overview: This element will display the cart overview.Cart Checkout Button: This element will display the cart checkout button.Cart Page Notices: This element will display the notices related to cart page.Cart Up Sell/Cross Sell: This element will display the Cart Products Upsell/Crossell Items.
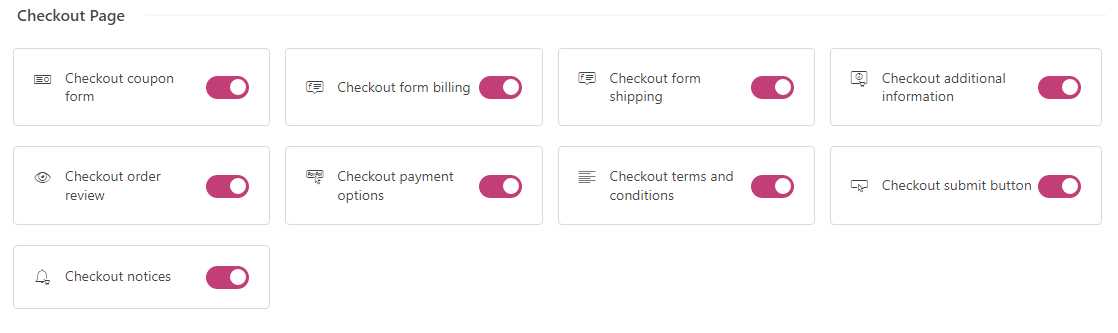
Checkout Page Elements
To create a page for Checkout page the elements that are available from our plugin are as follows:
Checkout Coupon Form: This element will display the checkout coupon form.Checkout form billing: This element will display the checkout billing form.Checkout form shipping: This element will display the checkout shipping form.Checkout additional information: This element will display the checkout additional information form.Checkout order review: This element will display the checkout order overview table.Checkout payment options:This element will display the available checkout payment options.Checkout terms and conditions: This element will display the checkout terms and conditions.Checkout submit button: This element will display the checkout submit button.Checkout notices: This element will display the notices that will appear on checkout page.
Thank You Page Elements
To create a page for Thank you page the elements that are available from our plugin are as follows:
Thank you order overview: This element will display the order overview table.Thank you order details: This element will display the order details table.Thank you customer details: This element will display the customer details.Thank you payment method: This element will display the payment method.

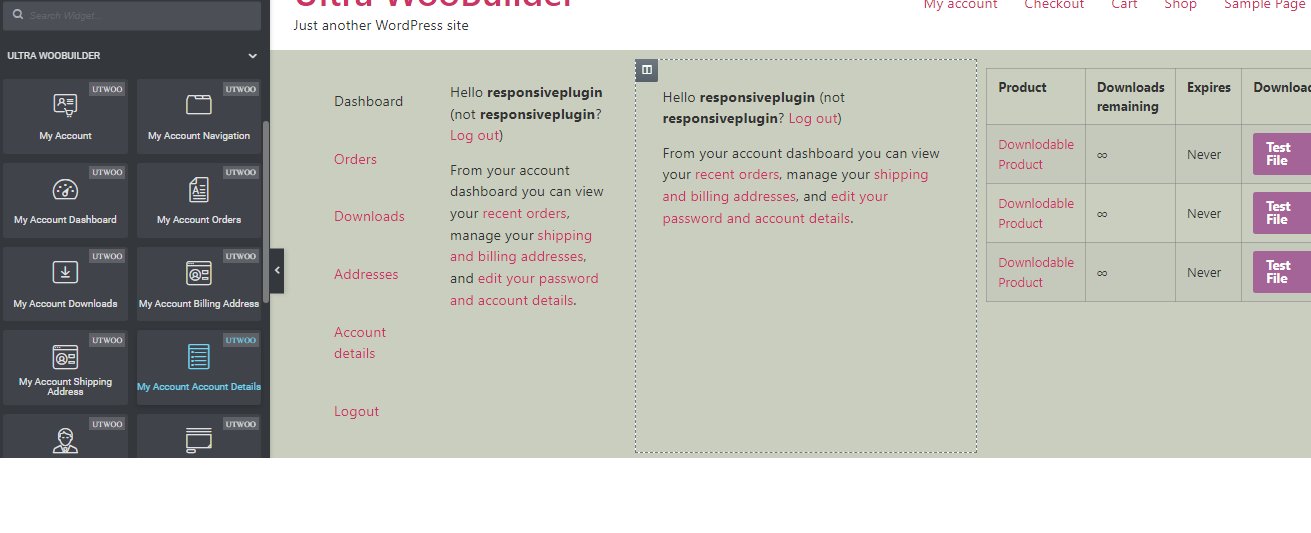
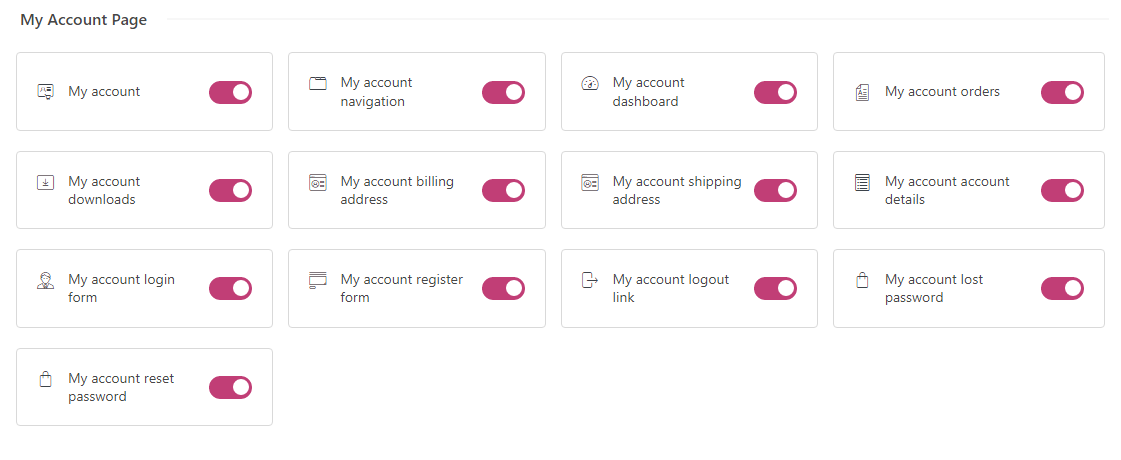
My Account Page Elements
To create a page for My account page the elements that are available from our plugin are as follows:
My account: This element will display the my account section.My account navigation: This element will display the my account navigation.My account dashboard: This element will display the my account dashboard.My account orders: This element will display the my account orders.My account downloads: This element will display the user's available downloads.My account billing address: This element will display the user's billing address.My account shipping address: This element will display the user's shipping address.My account account details: This element will display the user's account details.My account login form: This element will display the user's login form.My account register form: This element will display the register form.My account logout link: : This element will display the user's logout link.My account lost password: This element will display the lost password form.My account reset password: This element will display the reset password form.
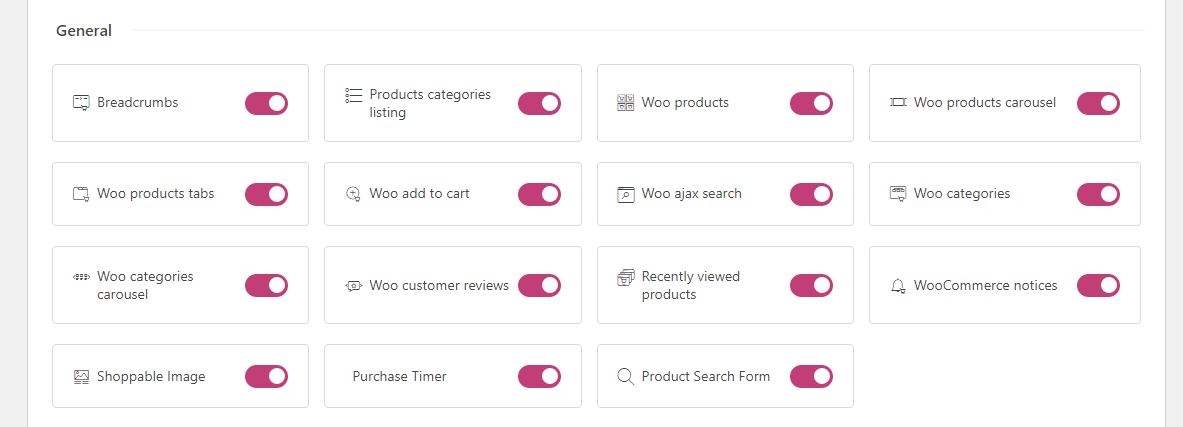
General Elements
The common elements that are available from our plugin are as follows:
Breadcrumbs: This element will display the current page breadcrumb.Products Categories listing: This element will display the categories.Woo Products: This element will display the products in grid layout.Woo Products Carousel: This element will display the products in carousel layout.Woo Products Tabs: This element will display the products in tabs with grid and carousel layouts.Woo Add to cart: This element will display the product's add to cart button.Woo Ajax Search: This element will display the ajax search form.Woo Categories: This element will display the available categories.Woo Categories Carousel: This element will display the available categories in carousel layout.Woo Customer reviews: This element will display the product's customer reviews.Recently viewed products: This element will display the recently viewed products by user.WooCommerce Notices: This element will display the WooCommerce notices.Shoppable Image: This element will display the shoppable image where you can place different image marker to describe the pins for image content.Purchase Timer: This element will display the countdown timer urgency to users when they add items to cart.Product Search Form: This element will display the product search form that will redirect the user to product search result page when they click on search after entering the search word.
jQuery
CSS & Fonts
- Font-Awesome (Font Icons)
- Select2
- Slick Slider
Note: Images used in the demonstration/preview images/screenshots are licensed to their respective owners and are not included in the download. All images used in the preview mode where companies logo are visible are copyrighted to its respective owners/companies. Useage of those images in your end product/project will be solely your responsibility and commercial license will be required from its owners/companies. All images are replaced with placeholder images in download files.
Once again, thank you so much for purchasing this template. As we said at the beginning, We'd be glad to help you if you have any questions relating this template. No guarantees, but we'll do our best to assist. If you have any suggestions on how to improve our templates or documentation please share them!
© 2023 Kaththemes. All Rights Reserved.